#Picademy

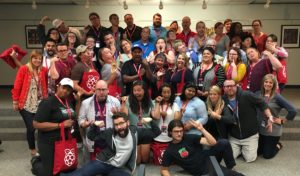
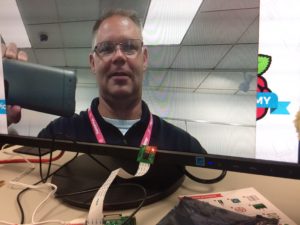
Last Thursday and Friday I had the incredible opportunity to participate in a training session called Picademy. For those who have not heard of Picademy, it is the Raspberry Pi Foundation’s free face-to-face training program that aims to support educators throughout their digital making and computing journey.

If you have not heard of a Raspberry Pi you must have been living under a rock for the past 5+ years. The Raspberry Pi is a credit card sized computer that costs $35. (You still have to provide a micro SD card, power plug, keyboard, mouse and monitor.)(If you run the Raspberry Pi headless [without a monitor using another computer to run using VNC], you don’t need the keyboard, mouse or monitor.) It is a fully functional computer running a version of Linux called Raspbian.

During the two days of the Picademy we were trained on using the Raspberry Pi. The training focused on digital making utilizing the Pi as a tool or material in the project we were making. I’m not sure if you caught what I just said. The Pi computer is just one of the many materials we used in our digital making.

Too often in schools we use technology to be able to say we used technology. We assign digital worksheets and call it technology integration. We spend thousands of dollars on 1:1 initiatives only to have students completing the same types of assignments as before.

Digital making utilizes many materials and the Pi or other tech device is just one of the materials required to build the project. What is essential to digital making is student choice. Giving the students the choice of what to build. The Picademy facilitators gave us a choice in what project we wanted to create. We all brainstormed ideas. There were many ideas, most of which were a solution to a problem or a need in our various schools, classrooms and maker spaces. One of my favorites was the exit ticket machine. The group created a program and a graphical user interface (GUI) to ask students a question. The students stepped up to the machine and pressed a button that corresponded with their answer. It tallied the results for the teacher to quickly collect.

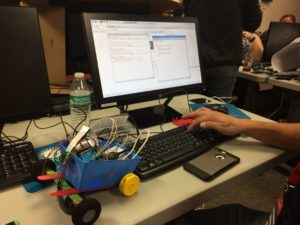
My group started with my idea in building a robot. I wanted to see if we could build a low cost robot that would be affordable to my students. The PiRover is pictured to the left. I had a need and my group worked to find a solution to the need.

Digital making is about students (not teachers) coming up with a solution to a problem or need and creating the solution. This is real world problem solving. The learning potential in digital making is massive.

The proof of potential learning is that every single team at the Picademy built something they had not built before. We all had to spend the 2 and a half hours learning. We had to find the information we needed to complete our projects. The facilitators were there for help, just like we are for our students. There were times that the facilitators did not have the answer. They only had suggestions or hits that might work or might lead us to our solution.

In addition to learning and practicing digital making, we were encouraged and given permission to fail. That isn’t something you usually hear. I tell my robotics students on the first day of class that they will fail more times that they will succeed. That is part of life. Think about how many inventors failed over and over again before the invention worked.

Overall, Picademy invited us to take on a maker mindset. Digital making requires a shift in how we teach. It changes the our role as teacher and the student’s role in learning. This maker mindset is where real world collides with the educational institution.

I guess what I am saying is Picademy was life changing. Life changing for me, my students and those who I can drag along with me.


Scratch and Makey Makey

IMG_3082 
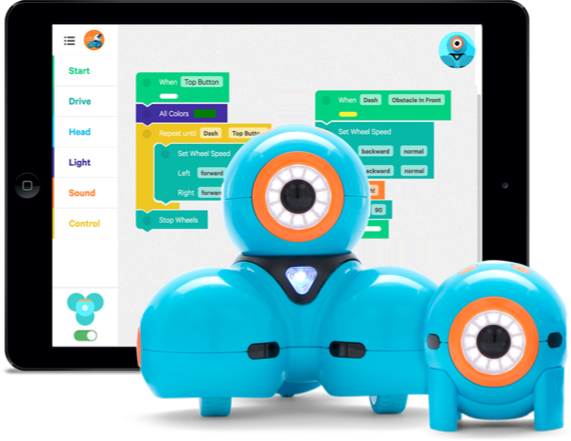
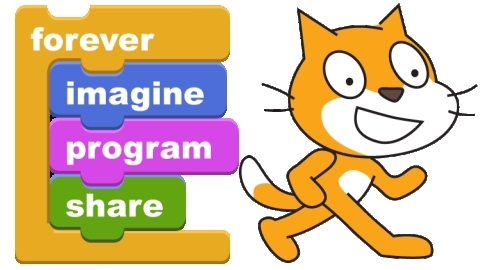
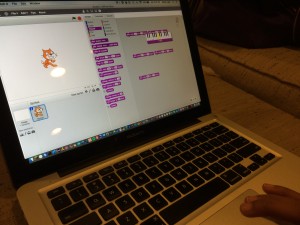
I recently got the Makey Makey out of the drawer to teach my 8 year old how to program using Scratch. She has had some experience using Blockly with her Dash robot by Wonder Workshop. She has also used Scratch Jr. for the iPad, but this is the first time programming for herself.

The program was simple, but the impact was great.

The program used the “when a key is pressed” event to play a note. Each key played a note in a song from my daughter’s song book she uses for her piano lessons. She had to know the keys and read the music just like when playing the piano. We wired the Makey Makey to match the program. She had to change the half notes (0.5 beat) to quarter notes (0.25 beat). That gave us the opportunity to talk about fractions and decimals.

IMG_3089
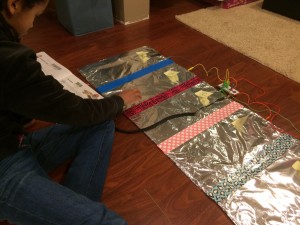
When using the Makey Makey, you have to connect yourself to complete the circuit. This gave us the opportunity to talk about electrical circuits and why our large piano works.

We also had a problem solving opportunity. Two of the “keys” had aluminum foil touching. This made two notes play at once. We talked about why the aluminum works to conduct electricity and how the tape and cardboard kept the electricity from one key from connecting to another.

To finish our programming, she got to play her song and others. This was a quick 30 minute activity, but we both had a blast and she learned a great deal.

Customizing your Twitter Account

Twitter (1)I hope you checked out the last post on using Twitter in your classroom. If you watched, I hope you set up your account. You are on your way to being well connected with others. It is time to customize your account to give it an unique look that lets others know who is behind the account. Customizing doesn’t take that long. Take a look at the next video in the Twitter in the Classroom series.


Using Twitter in the Classroom

TwitterIn our twenty-first century world, it is easier than ever to connect with other educators from around the world. There are still some teachers who don’t see the value in expanding their Professional Learning Network (PLN). I am hoping not only to show you why connecting with teachers outside your school district or surrounding communities is important, but how to grow your PLN as well.

One of the easiest ways to connect with anyone these days is through Twitter. Lots of you have never considered Twitter, while others might have signed up and created an account only to abandon it a week later.

I have created a series of videos on how to setup, customize and use Twitter in the classroom.

I hope you’ll keep and open mind and check out this series. The first video is below.

Minecraft in the classroom

minecraftBack in April I posted about using Minecraft in the classroom. (You can check out that post here.) At that time I was taking an online course on using Minecraft in the classroom. I learned not only about the game itself, but how to integrate it into the classroom.

Since April I was awarded a grant to integrate Minecraft into the curriculum. We started the program in October. I would like to share the knowledge I have gained from this experience.

To start with, I found I could ask students to do just about anything and have it completed with little complaining and with a high percentage of completion if I tied it to getting to build in Minecraft.

To elaborate, I’ll explain my project. Students read the book Hunger Games by Suzanne Collins in their Language Arts classes. They also studied the characteristics of civilizations in World Studies. So, students knew about Hunger Games and what makes a good civilization. I decided to have the students create a “secret” District 14. This would be the ideal civilization, unlike the rest of the country. But, the students had to keep the civilization probable compared to what they read in the book. With that knowledge, students had to write a one page plan explaining the various aspects of the district and why, with evidence from the book how it would fit into the overall theme of Hunger Games.

Most seventh graders would be complaining about typing a one page paper, but not these students. They saw it as a means to and end. If they got the paper typed, they got to play Minecraft. Some tried to write the paper quickly, without much time and effort. These students found the paper being returned. They did a much better job the second time.

Students, in most classes, worked very well together. They had to collaborate and work in teams to build the various areas of the district. Minecraft experts helped the beginner and novice players. I could hear students tell another, “You work on the wall and I’ll build the roof.” Or I would hear one say, “They wouldn’t use diamonds to build a house.” It was exciting to watch.

We integrated math by building structures to a prescribed size based on the plan. Students really had to comprehend the literature to prove the accuracy of what was planned. Many times we would stop and look around to critique what was being built.

Over all students had a blast and didn’t realize how much they were demonstrating their knowledge. Students really got into the literature compared to years past. Later this year I will get to evaluate how much better students learned the characteristics of civilizations when they complete a civilization project in World Studies.

So, if you have been tempted to try a little Minecraft in your classroom, give it a shot, you won’t be sorry.

(I’ll post some technical information soon on how you can set up your own server in your classroom.)

Scratch Creative Computing

Here is a video I created and posted for my students on how to make a flappy bird type game. The ideas came from the Scratch Creative Computing workbook. This is the best curriculum for teaching Scratch that I have found. Although I don’t use the workbook from cover to cover, I do use many of the ideas and techniques in my short Scratch programming unit. I wish I could teach an entire semester of Scratch. I would use this workbook each and every semester!

Inspiration, Collaboration, Innovation

Back in August 2014 I posted about the robotics program (read that post here) that I was introducing to the eighth students in the district where I teach. After two semesters and five classes of robotics I can honestly say that students need some sort of programming course in their schedule.

Watch this short video where my program was highlighted with three other high quality projects.

The trouble with technology is that you cannot sit still. You have to continually move forward working to integrate into the classroom new and innovative ideas each and every year. The plan for next year is to add high school robotics courses to the existing eighth grade course. This will allow more students to take advantage of a robotics course. It will also allow advanced courses for students with more of an interest in programming and robotics. The robots will also change a bit. Instead of using the LEGO EV3 robots, students will couple the LEGO NXT with TETRIX to build more robust and powerful robots.

A special thanks to the GAR Foundation for funding this project. Without the funding this project would never have become a reality.


Yes you can… Robotics

dash-dotThis week’s post comes from a first grade teacher in my district. Mrs. Murphy gives an honest and real look at how a little courage can go a long way to integrating some really cool technology into any classroom.

I’ll let Mrs. Murphy explain.


I  had never even heard of robotics for elementary school aged children until September of this school year.  I thought that was something for the “smart high school teachers.”  That all changed when one of my colleagues told me that she found a really neat project for elementary school kiddos using robots.  At first I was like “oh good luck finding people to help with that.”  At that point the interest level was not that high.  I figured if she was willing to attempt something new I could give it a try, too.  The rest is history!!  I am currently using a lego We-Do set and Dot and Dash in my classroom.  The interest level of my kiddos is out of this world.  They love using the robots.

After talking to our curriculum director about this grant we wrote, she told us that she would be willing to pay for us to attend a robotics workshop to gain more knowledge.  I went and learned a ton!  I will admit it was a little overwhelming at first.  This robotics language was way above a first grade teachers head.  But I stuck with it!!

After deciding that I would like to try out some robotics I got in touch with two companies and they graciously allowed me to pilot their products in my classroom!  My awesome curriculum director found funds to purchase 2 iPads for use in my classroom.

My kids helped me with this process.  I laugh because they had the robots programmed and going down the hallway in the school before I could remember my app store password.  To say they were excited would be a huge understatement!

This love of learning has spread to every child in my classroom as well as the other kids in the hallway.  They ask constantly to use Dot and Dash in the hall.  It is amazing to see first graders coding to make the robots do certain activities!  It is definitely higher level thinking skills.  I can see how this will help them in the future.

I am so glad that my colleague asked me in September if I would be interested in having a robot in my classroom.  I am also glad that I went way outside of my comfort zone and said I would give it a try.  I am really hoping that we receive our grant so that our entire school can use the robotics programs next year!!

As you can see, if you are willing to step out of your comfort zone great things can happen. I am so excited to see students who are excited about learning. (The Dash and Dot are from Wonder Workshop.)

Yes you can… Scratch

scratchAs it is written on the Scratch website, Scratch programming is…

With Scratch, you can program your own interactive stories, games, and animations — and share your creations with others in the online community.

Scratch helps young people learn to think creatively, reason systematically, and work collaboratively — essential skills for life in the 21st century.

Scratch is a project of the Lifelong Kindergarten Group at the MIT Media Lab. It is provided free of charge.

Basically that means that students can program whatever they wish. You can make cartoons move around the screen with or without interactivity. You can create your own video game. You can do whatever you want, period.

Programming in Scratch is very easy. It is a graphical interface, so all you have to do is drag blocks into the work space and connect the blocks together. It is that easy. Here is a video to prove my point.

I found a great resource to help teach students programming with Scratch. You can find at http://scratched.gse.harvard.edu/guide/index.html. Currently my students are creating games. They have learned how to make things move around the screen and how to make things interact with each other and now. (Of course they have learned many little things along the way, like problem solving and troubleshooting.)

On page 62 of the learner guide, the students made a maze game. It is a basic game and took my students two 40 minute periods to make. I allowed students to take creative liberties as long as the main goal was still to guide an object through a maze to and end point. Also you will see from page 63 of the learner guide a pong game. Again, students were creative and surpassed my expectations. Below is some videos of my students’ projects. You will be blown away with the creativity if you give students time and permission.


If you are saying this still looks too hard that is because you haven’t tried Scratch. On the website linked above, there is a teacher guide to help you learn how to program in Scratch. The only thing holding you back is fear. Start small. Have students work through a few pages of the guide. Let them teach you. The impact on you students is great.

Yes you can…

ComputerFrustrationWhen it comes to integrating technology, one thing I hear from teachers on a regular basis is “I could never _________ ” (fill in the blank). They could never have students create a multimedia presentation. They could never have students program animations. They could never make an instructional video. They could never utilize Google applications. Never, never, never.

I would like to say with complete sincerity and confidence that YES YOU CAN! Integrating technology isn’t just for those of use who are tech savvy or the young teacher who grew up with technology. Integrating is something we call can do and something we all should do. The students

I will be posting as series on integration ideas that everyone can accomplish with a little planning and courage. So, while you wait with great anticipation for the first post next week, think of the cool projects you want to do, but are too afraid to try. Send those ideas to me and I will post some thoughts on how to make the project a reality.